Headers play an important role in structuring your document, making it more professional and easy to navigate. Adding and customizing headers in Google Docs can help your content stand out, whether you're creating a report, essay, or presentation. This guide will walk you through the steps to efficiently add and modify headers, including changing their background for a professional design.
Adding a Header to Your Document
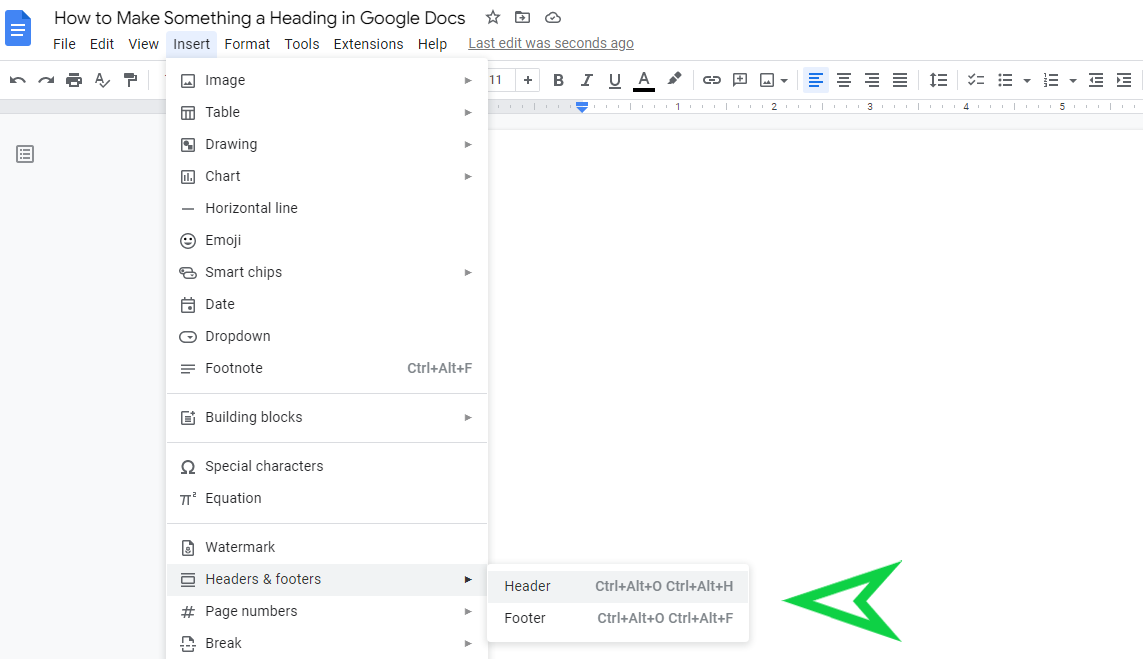
Step 1: Navigate to the top menu and select Insert → Headers & Footers → Header.
Step 2: In the newly added header section, type the desired text. This text will automatically appear on every page of the document.

Step 3: To make the header appear only on the first page, enable the Different first page option.
You can modify the header's text by adjusting its font size, color, and style through the toolbar.
Customizing the Header Background
Step 1: From the top menu select Insert → Drawing → New

Step 2: In the drawing tool, create a square or rectangular shape and fill it with the desired color. Then, click Save and Close.

Step 3: Drag the newly created shape into the header area of the document.
Step 4: Set the image's position to Behind text and choose Fix position on page. Resize the image to cover the entire header area.

By following these steps, you can create headers that enhance your document's readability and visual appeal. Customizing headers is a straightforward way to add a professional touch, ensuring your document leaves a lasting impression.