Google Docs is a versatile tool for creating and editing documents, but sometimes you may want to add a personal touch to your documents by changing the background color of just one page. While Google Docs doesn't offer a built-in feature for this, you can achieve it with a clever workaround. In this article, we will guide you through the process of changing the background color of a single page in Google Docs using custom drawings.
Step-by-Step Guide
Follow these steps to change the background color of only one page in your Google Docs document:
Step 1: Open Your Google Docs Document
Log in to your Google account and open the Google Docs document that you want to edit.
Step 2: Insert a Custom Drawing
- Click on the page where you want to change the background color.
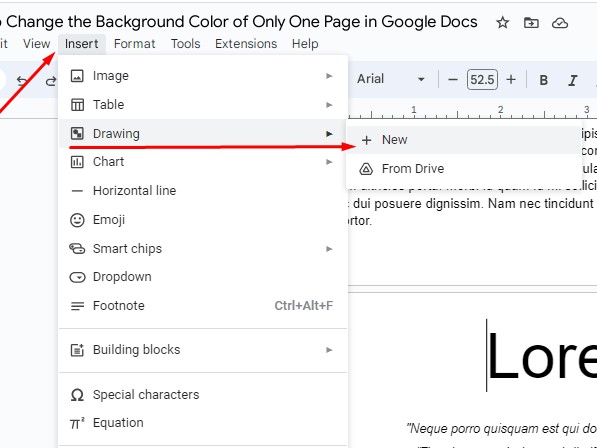
- Go to the "Insert" menu at the top of your screen.
- From the dropdown menu, select "Drawing" and then click on "+ New."
Step 3: Create a Colored Shape
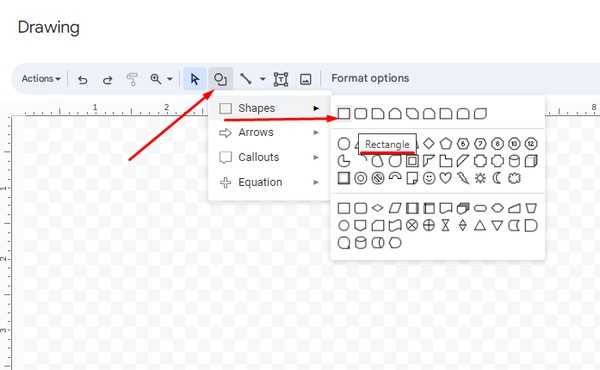
- In the Drawing dialog that opens, you'll see a variety of drawing tools at the top. Click on the "Shape" icon (it looks like a square).
- Choose a shape, such as a rectangle, and draw it to cover the entire page. Don't worry if it covers your text for now; we will make it transparent later.
Step 4: Fill the Shape with a Color
- After drawing the shape, you can customize its appearance. Click on the paint bucket icon in the toolbar.
- A color palette will appear. Choose the background color you want for the page and make border transparent.
- Click "Save and Close" when you're satisfied with the color.

Step 5: Make the Shape Transparent
- Click on the colored shape you just created.
- In the toolbar, click on the "Actions" menu (represented by three vertical dots).
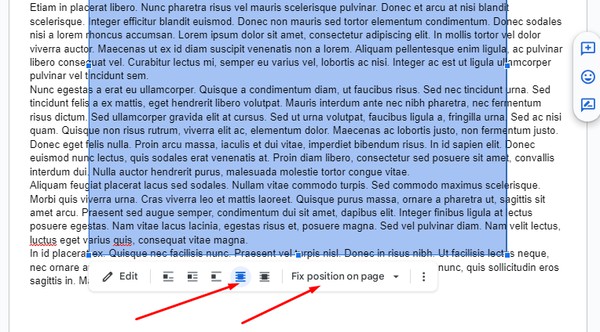
- Choose "Text Wrapping -> Style" and then select "Behind Text".
- Choose "Fix position on page"
- In sidebar position settings set "Relative to top left of page" select 0 & 0.

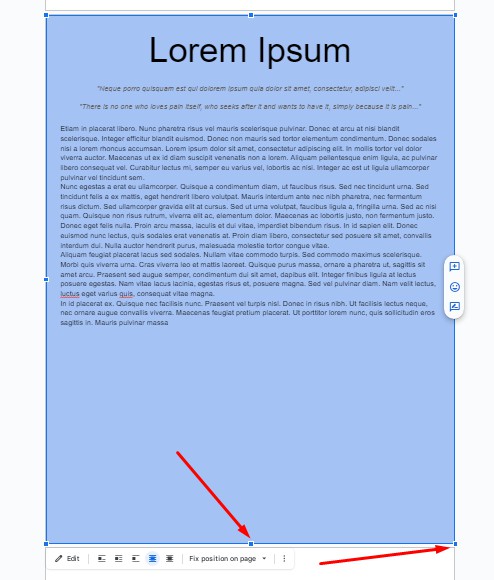
Step 6: Stretch the Shape to Page Size
- Click on the colored shape to select it. You should see blue resizing handles around the shape.
- Click and drag these handles to stretch the shape to cover the entire page. Make sure it goes behind your text and other content.
And there you have it! You've successfully changed the background color of only one page in your Google Docs document using a custom drawing. Your text and other content should now appear on top of the colored background, giving your document a unique and personalized look.
Remember that if you need to make further edits or changes to the content on that page, you can always access and modify the colored shape through the "Edit" option in the Drawing dialog.
This workaround may take a bit of time, especially for documents with complex formatting, but it provides a way to add a personal touch to your Google Docs documents when needed.